UI開発におけるコンポーネント指向とは
- UIを独立した再利用可能な部品(コンポーネント)に分割
- コンポーネントにHTML(DOM)、ロジック(JavaScript)、CSSをカプセル化
React、Vue.js、Angularなどフロントエンドの主要なViewフレームワークで採用されている手法
これをRailsに輸入したいというのが今回の話題
コンポーネントの例
検索ボックス(SearchBoxコンポーネント)
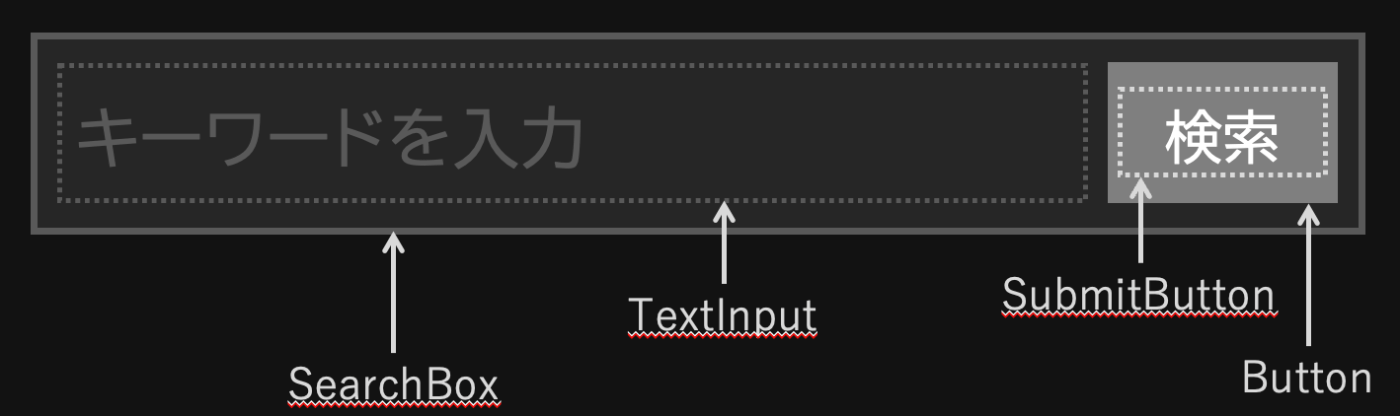
- SearchBoxコンポーネントはTextInputとSubmitButtonを包含
- SubmitButtonのスタイルは上位のButtonコンポーネントで定義される
- アトミックなコンポーネントを入れ子に構成して大きなコンポーネントを組み立てていく
コンポーネント指向UIのメリット
再利用性
コンポーネントを他の機能や他のシステムで再利用することが容易
保守性とテスト容易性
コンポーネントは独立して機能するため、修正・更新・テストが容易
可読性
小さな単位のコンポーネントで構成されるので、コードの可読性が向上
再利用可能なデザイン
デザインシステムやスタイルガイドを作成して、全体でUIデザインの一貫性を保つことができる
分業性
コンポーネントを独立して開発できるため、チーム内でのタスク分担が容易
コンポーネント指向UIのデメリット
最初は大変
大量のコンポーネントを作る必要がある
→ GitHubではPrimerというデザインシステムを公開しているので利用するのもあり (個人的にはTailwind CSSを使いたかったのでスクラッチで作ってます)
ページデザインとの相性が悪い
デザイナーがコーディングしたHTMLをベースに… というのはやりにくい
ページをデザインするのではなく、コンポーネントをデザインする必要がある
Railsでコンポーネント指向UI開発するには
パーシャルテンプレートで実装する?
<%# _search_box.html.erb %>
<% content_for :head do %>
  <style>
   // CSS...
  </style>
<% end %>
<%
  ## Rubyのコード...
%>
<script>
  // JavaScriptのコード...
</script>
<form>
  <%= render 'text_input', name: 'q', placeholder: placeholder %>
  <%= render 'submit_button', label: '検索' %>
</form>
近いことはできそうだが、不完全
スコープ化が不完全、性能が悪い、単体テストが難しい
ViewComponentとは
Railsでコンポーネント指向UIを実装でできる (GitHub謹製、github.comのために作られたライブラリ)
こんなふうにコンポーネントを実装できます
## app/components/search_box_component.rb
class SearchBoxComponent < ViewComponent::Base
  def initialize(placeholder:)
    @placeholder = placeholder
  end
end
<%# app/components/search_box_component.html.erb %>
<form>
  <%= render(TextInputComponent.new(name: 'q', placeholder: @placeholder)) %>
  <%= render(SubmitButtonComponent.new(label: '検索') %>
</form>
使いかた
<%= render(SearchBoxComponent.new(placeholder: 'キーワードを入力')) %>
Rails 6.1のrender拡張とViewComponent
パーシャルテンプレートを呼ぶ機能だったrenderだが、Rails 6.1でrender_inメソッドを実装したオブジェクトを渡せるようになった
<%= render ExampleComponent.new %>
class ExampleComponent
  def render_in(view_context)
    view_context.content_tag(:p, 'Hello, World!')
  end
end
Rails的にはこの機能を 「サードパーティー製のコンポーネントフレームワークのサポート」 と謳っている
これを利用したのがViewComponent
一時「ActionView::ViewComponent」という名前でRails本体にマージされたようだが、結果的にはこの形になったよう
基本的な使い方
# app/components/example_component.rb
class ExampleComponent < ViewComponent::Base
  def initialize(title:)
    @title = title
  end
end
<%# app/components/example_component.html.erb %>
<span title="<%= @title %>"><%= content %></span>
使い方
<%= render(ExampleComponent.new(title: 'my title')) do %>
  Hello, World!
<% end %>
結果
<span title="my title">Hello, World!</span>
応用機能
スロット
複数のコンテンツブロックを渡せる
## app/components/article_component.rb
class ArticleComponent < ViewComponent::Base
  renders_one :heading
  renders_one :body
end
<%# app/components/article_component.html.erb %>
<h1><%= heading %></h1>
<p><%= body %></p>
使い方
<%= render(ArticleComponent.new) do |component| %>
  <% component.with_heading do %>
    My Title
  <% end %>
  <% component.with_body do %>
    Hello, World!
  <% end %>
<% end %>
コレクション
配列を渡して繰り返し出力できる
Viewでループを書かなくてもリストが作れる
## app/components/product_component.rb
class ProductComponent < ViewComponent::Base
  def initialize(product:)
    @product = product
  end
end
使い方
<%= render(ProductComponent.with_collection(@products)) %>
※ デフォルトでは自動的にコンポーネント名に基づいた引数に渡される(ここではproduct)
条件付きレンダリング
Viewでif分岐する必要がなくなる
## app/components/confirm_email_component.rb
class ConfirmEmailComponent < ViewComponent::Base
  def initialize(user:)
    @user = user
  end

  def render?
    @user.requires_confirmation?
  end
end
View実装例
最終的にviewの中身はHTMLがなくなってコンポーネントがたくさん置かれるだけのものになる
edit.html.erbの例
<%= form_with model: [:admin, @record] do |f| %>
  <%= render(FormComponent.new(model: @record) do %>
    <%= render(FormFieldTextComponent.new(form: f, attribute: :email) %>
    <%= render(FormFieldTextComponent.new(form: f, attribute: :nick_name) %>
    <%= render(FormFieldPasswordComponent.new(form: f, attribute: :password, autocomplete: 'new-password') %>
    <%= render(FormFieldPasswordComponent.new(form: f, attribute: :password_confirmation) %>
  <% end %>
<% end %>
ちょっと改善
ヘルパーを作ると少し可読性が良くなるかも
module ApplicationHelper
  def component(name, *args, **kwargs, &)
    component = "#{name.to_s.camelize}Component".constantize
    render(component.new(*args, **kwargs), &)
  end
end
<%= form_with model: [:admin, @record] do |f| %>
  <%= component :form, model: @record do %>
    <%= component :form_field_text, form: f, attribute: :email %>
    <%= component :form_field_text, form: f, attribute: :nick_name %>
    <%= component :form_field_password, form: f, attribute: :password, autocomplete: 'new-password' %>
    <%= component :form_field_password, form: f, attribute: :password_confirmation %>
  <% end %>
<% end %>
Helper? Decorator? Partial? Component?
かくして、共通的にデータを整形して表示する主な手段は以下の4つとなる
Helper
<%= put_datetime user.created_at %>
Decorator (ViewModel)
<%= user.decorate.created_at %>
Partial
<%= render 'partial/datetime', user.created_at %>
ViewComponent
<%= render(DateTimeFormatComponent(datetime: user.created_at)) %>
GitHub的には全部Component推しのよう
JavaScriptコードのカプセル化
フロントエンドのコードもグローバルスコープに置かず、コンポーネントに閉じ込めたい
ViewComponentではそのための機能は特に用意されていないので、工夫が必要
相性のよさそうなフレームワークとして、StimulusとAlpine.jsを紹介します
Stimulus
Hotwireの構成要素。Rails 7の標準のシンプルなjsフレームワーク
Alpine.js
Vue.jsのようなHTMLをテンプレートとしたリアクティブデータバインディングが可能な軽量フレームワーク
JavaScriptコードのカプセル化(Stimulus編)
StimulusはHTML要素とJavaScriptコードを1:1でマッピングできる
<%# counter_component.html.erb %>
<div data-controller="counter">
  <h1 data-counter-target="display">0</h1>
  <button data-action="click->counter#increment">Count Up!</button>
</div>
// counter_component.js
import { Controller } from '@hotwired/stimulus';

export default class extends Controller {
  static targets = ['display'];
  connect() {
    this.count = 0;
  }
  increment() {
    this.count++;
    this.displayTarget.textContent = this.count;
  }
}
JavaScriptコードのカプセル化(Alpine.js編)
HTML要素とデータオブジェクトを 双方向バインディング
<%# counter_component.html.erb %>
<div x-data="counterComponent">
  <input type="text" x-model="count">
  <button @click="increment()">Count Up!</button>
</div>
// counter_component.js
export default () => ({
  count: 0,

  increment() {
    this.count++;
  }
});
双方向バインディングなので、テキストボックスに「10」と入力してからCount Up!を押すと「11」になる
シンプルな内容であればデータオブジェクトを用意しなくても実装できる
<%# counter_component.html.erb %>
<div x-data="{ count: 0 }">
  <input type="text" x-model="count">
  <button @click="count++">Count Up!</button>
</div>
Railsではロジックの大半はサーバサイドに行くので、フロントエンドはこれで事足りることが多いのでは
シンプルながらモダンなリアクティブ実装ができ、分かりやすく書けるので、個人的にはAlpine.js推し
CSSのカプセル化
CSSもコンポーネント単位で完結するようにしたいが、ViewComponentでは機能は用意されていない
classのスコーピングには色々テクニックはあるが、そもそもかなり難しい問題
- 「BEM」など命名ルールで凌ぐ方法
- 「CSS in JS」などJavaScriptでスタイルを定義する手法(React界隈)
決定的な方法がないです
いっそ、CSSを書くことを諦めるという手も…
CSSのカプセル化(Tailwind CSS)
Tailwind CSS 一押し!
class属性でスタイルを埋め込みで指定していく、ユーティリティーファーストのCSSフレームワーク
本来のCSSの思想を尊重したらあり得ない設計です 💦
<div class="flex justify-center items-center h-screen bg-gray-200">
  <div class="bg-white p-8 rounded shadow-lg text-center">
    <h2 class="text-2xl mb-4 text-blue-500">Hello, Tailwind CSS!</h2>
    <p class="text-gray-700">This is a simple example of using Tailwind CSS.</p>
    <button class="mt-4 px-4 py-2 bg-blue-500 text-white rounded hover:bg-blue-400">
      Click me
    </button>
  </div>
</div>
しかしコンポーネントにデザインを閉じ込めたいというニーズには大変適している
コンポーネント指向を採用していない場合は保守性を損なうので使わないほうがいいと思いますが
コンポーネントのテスト
コンポーネントは独立したオブジェクトなので単体テストが書きやすい
従来のViewはほとんど単体テスト不可能でした
# search_box_component_spec.rb
RSpec.describe SearchBoxComponent, type: :component do
  let(:component) { described_class.new(placeholder: 'キーワードを入力') }

  it 'renders the message' do
    html = render_inline(component)
    expect(html.text).to include('キーワードを入力')
  end
end
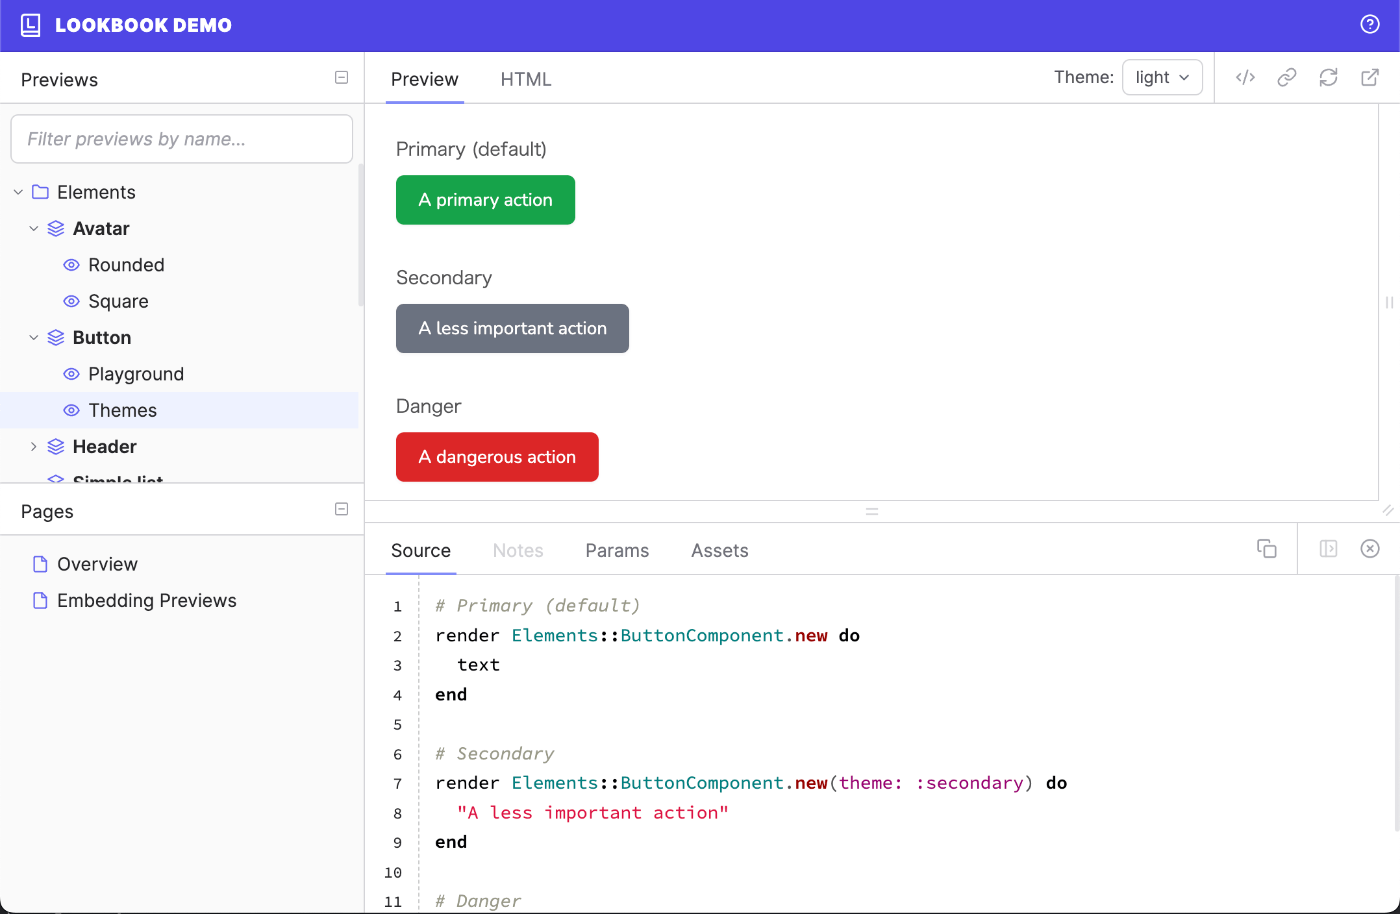
プレビュー
コンポーネント単体でプレビューできる。フロントエンド界隈の Storybook と同等
コンポーネントをアプリケーションから切り離して単体で開発でき、カタログとして共有できる
ViewComponent標準でもプレビュー機能を持っているが、より高機能なサードパーティの Lookbook や ViewComponent::Storybook がおすすめ
プレビューの定義
サンプルのrenderを書いておくだけ
# search_box_component_preview.rb
class SearchBoxComponentPreview < ViewComponent::Preview
  def default
    render(SearchBoxComponent.new(placeholder: 'キーワードを入力'))
  end
end
プレビューをテストケースに使う
おすすめ
# search_box_component_spec.rb
RSpec.describe SearchBoxComponent, type: :component do
  it 'renders the message' do
    html = render_preview(:default)
    expect(html.text).to include('キーワードを入力')
  end
end
※ デフォルトでは対象のコンポーネントはテストのファイル名を元に自動的に推測される